Table of Contents
- How to Test Soil Texture
- Materials Required for Soil Texture Test:
- Step #1 - Dig a Soil Sample
- Step #2 - Sift Your Soil
- Step #3 - Fill a Quart Mason Jar With the Sifted Soil
- Step #4 - Add the Water
- Step #5 - Add the Dish Detergent
- Step #6 - Add the Lid and Shake
- Step #7 - Mark the Sand Layer
- Step #8 - Mark the Silt Layer
- Step #9 - Mark the Clay Layer
- Step #10 - Assess Your Soil Composition
- How to Read the Soil Texture Triangle
- Soil Texture Classifications
- Additional Resources
- Final Thoughts
* Our articles never contain AI-generated slop *
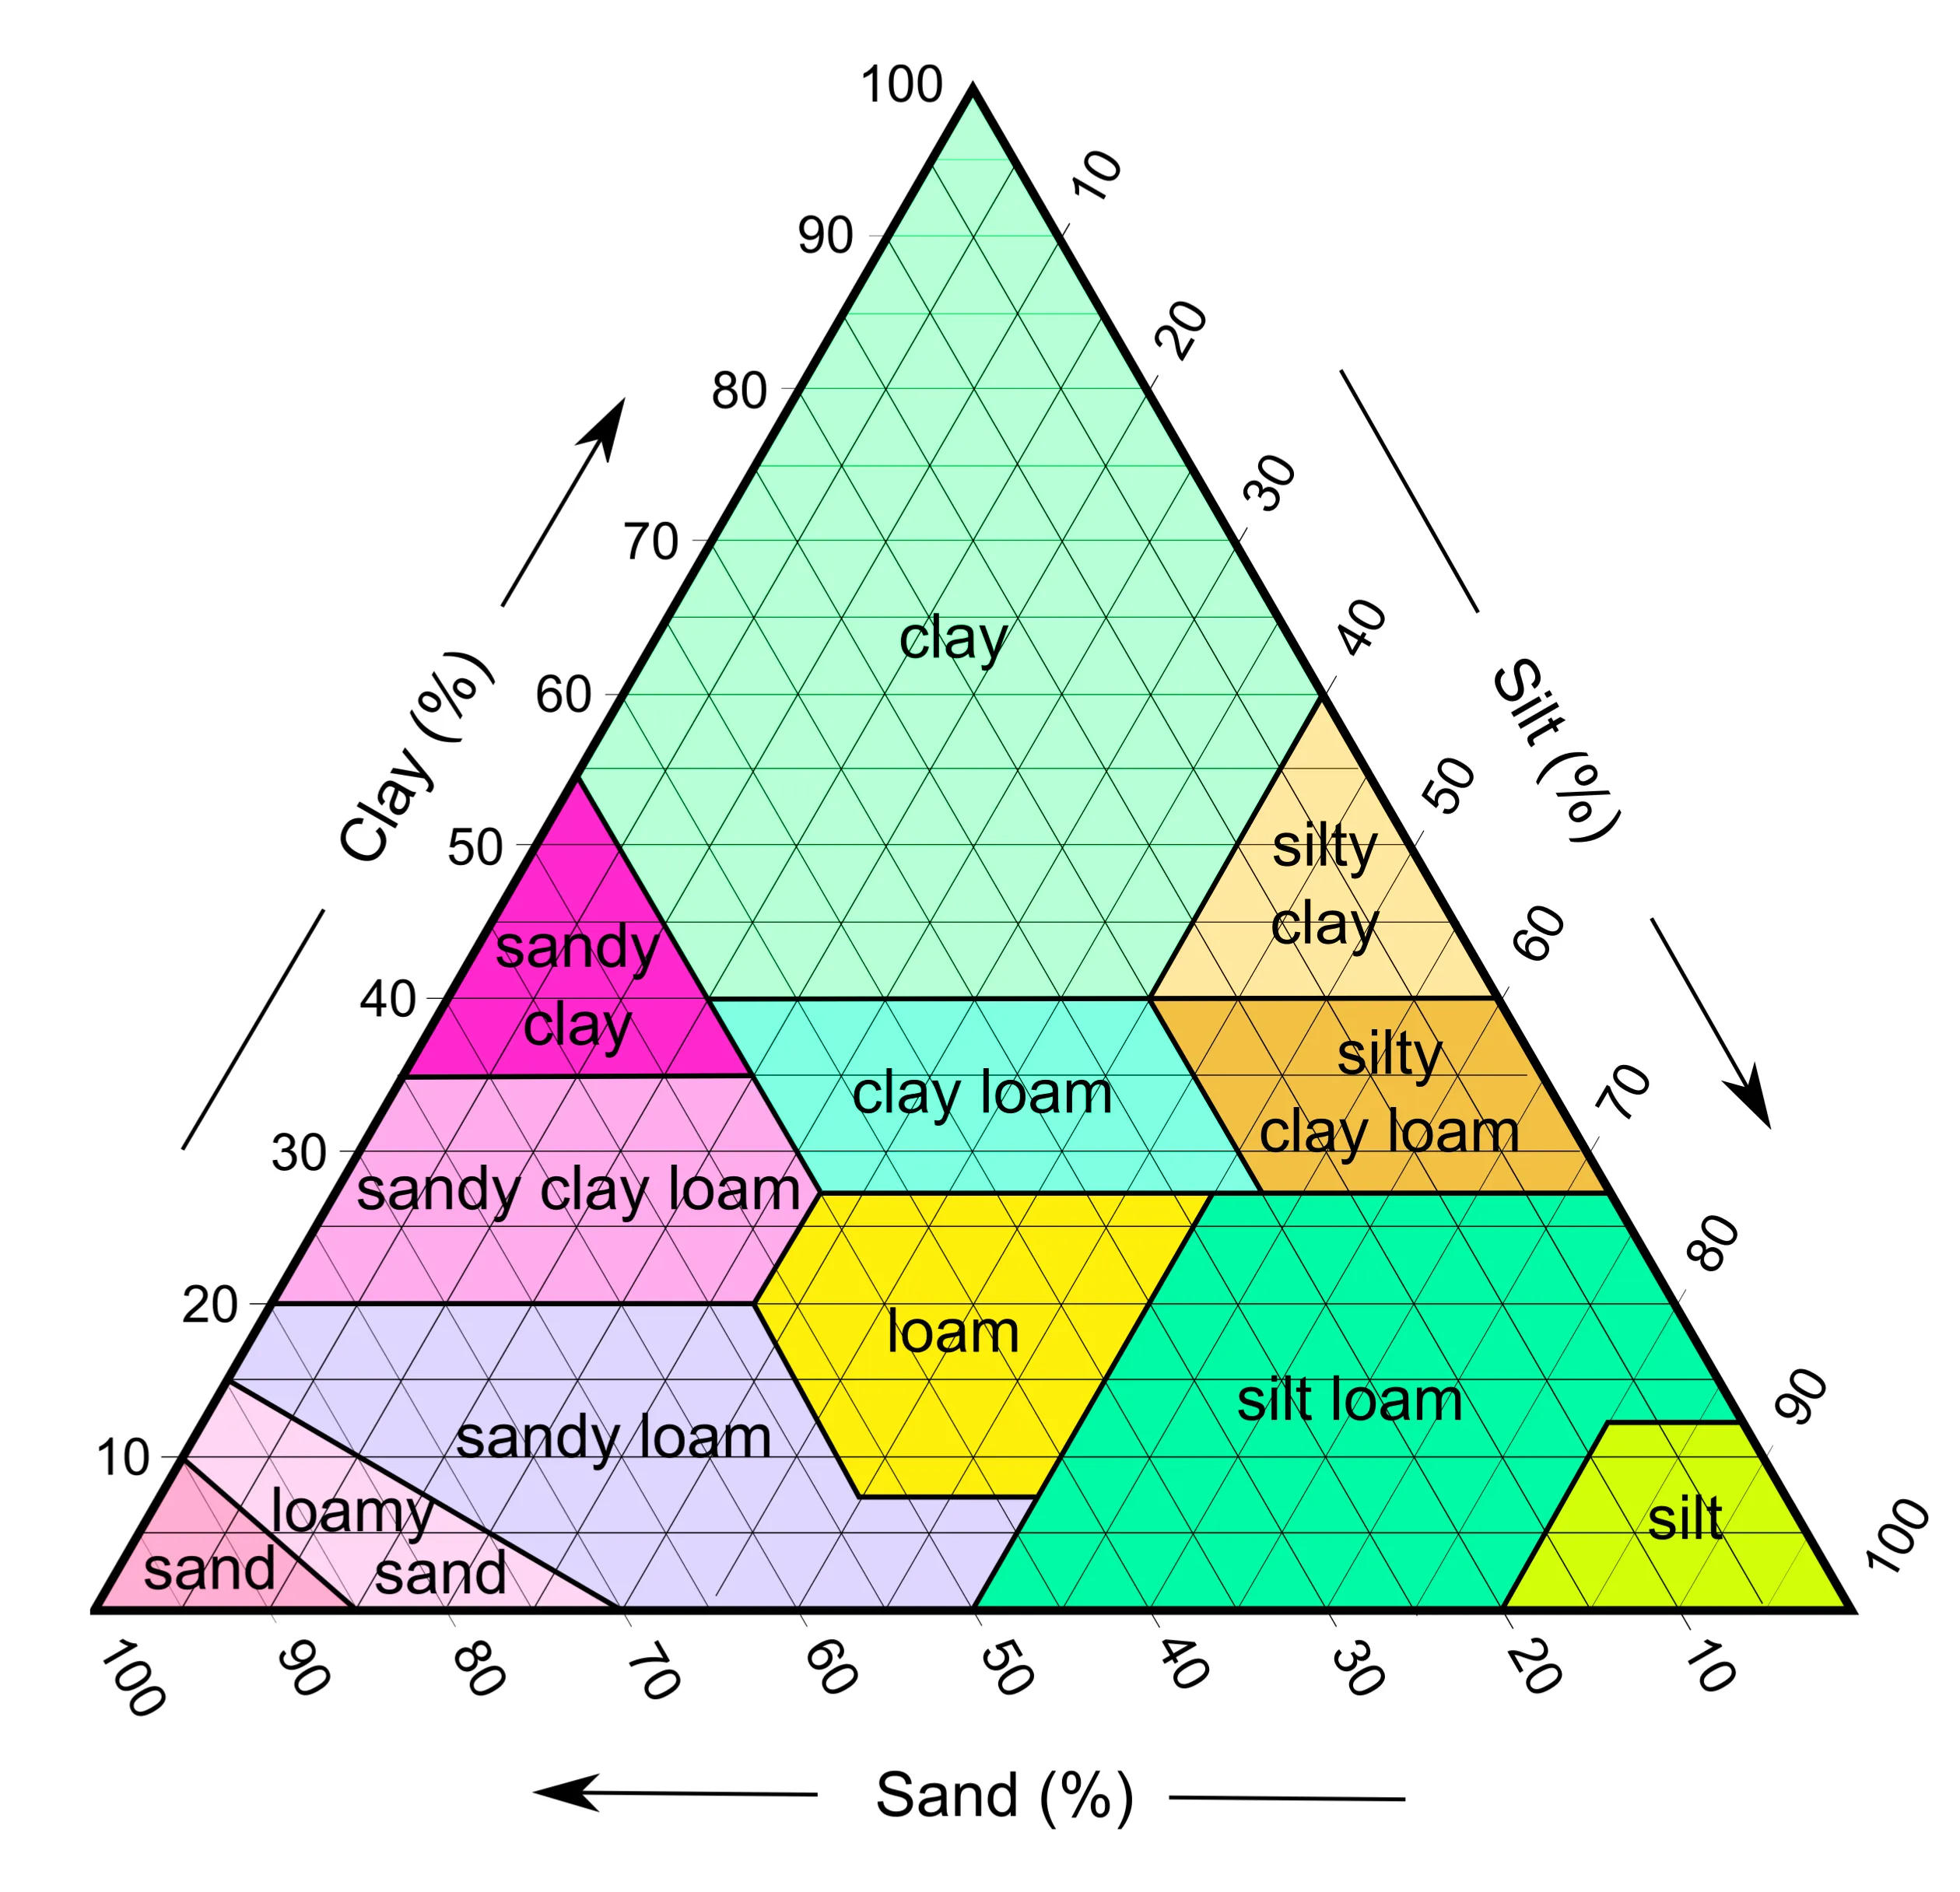
Welcome to the soil texture triangle! This tool gives us invaluable insight into the texture and composition of our soils, which is especially important to understand for agriculture, gardening, ecology, and soil remediation.
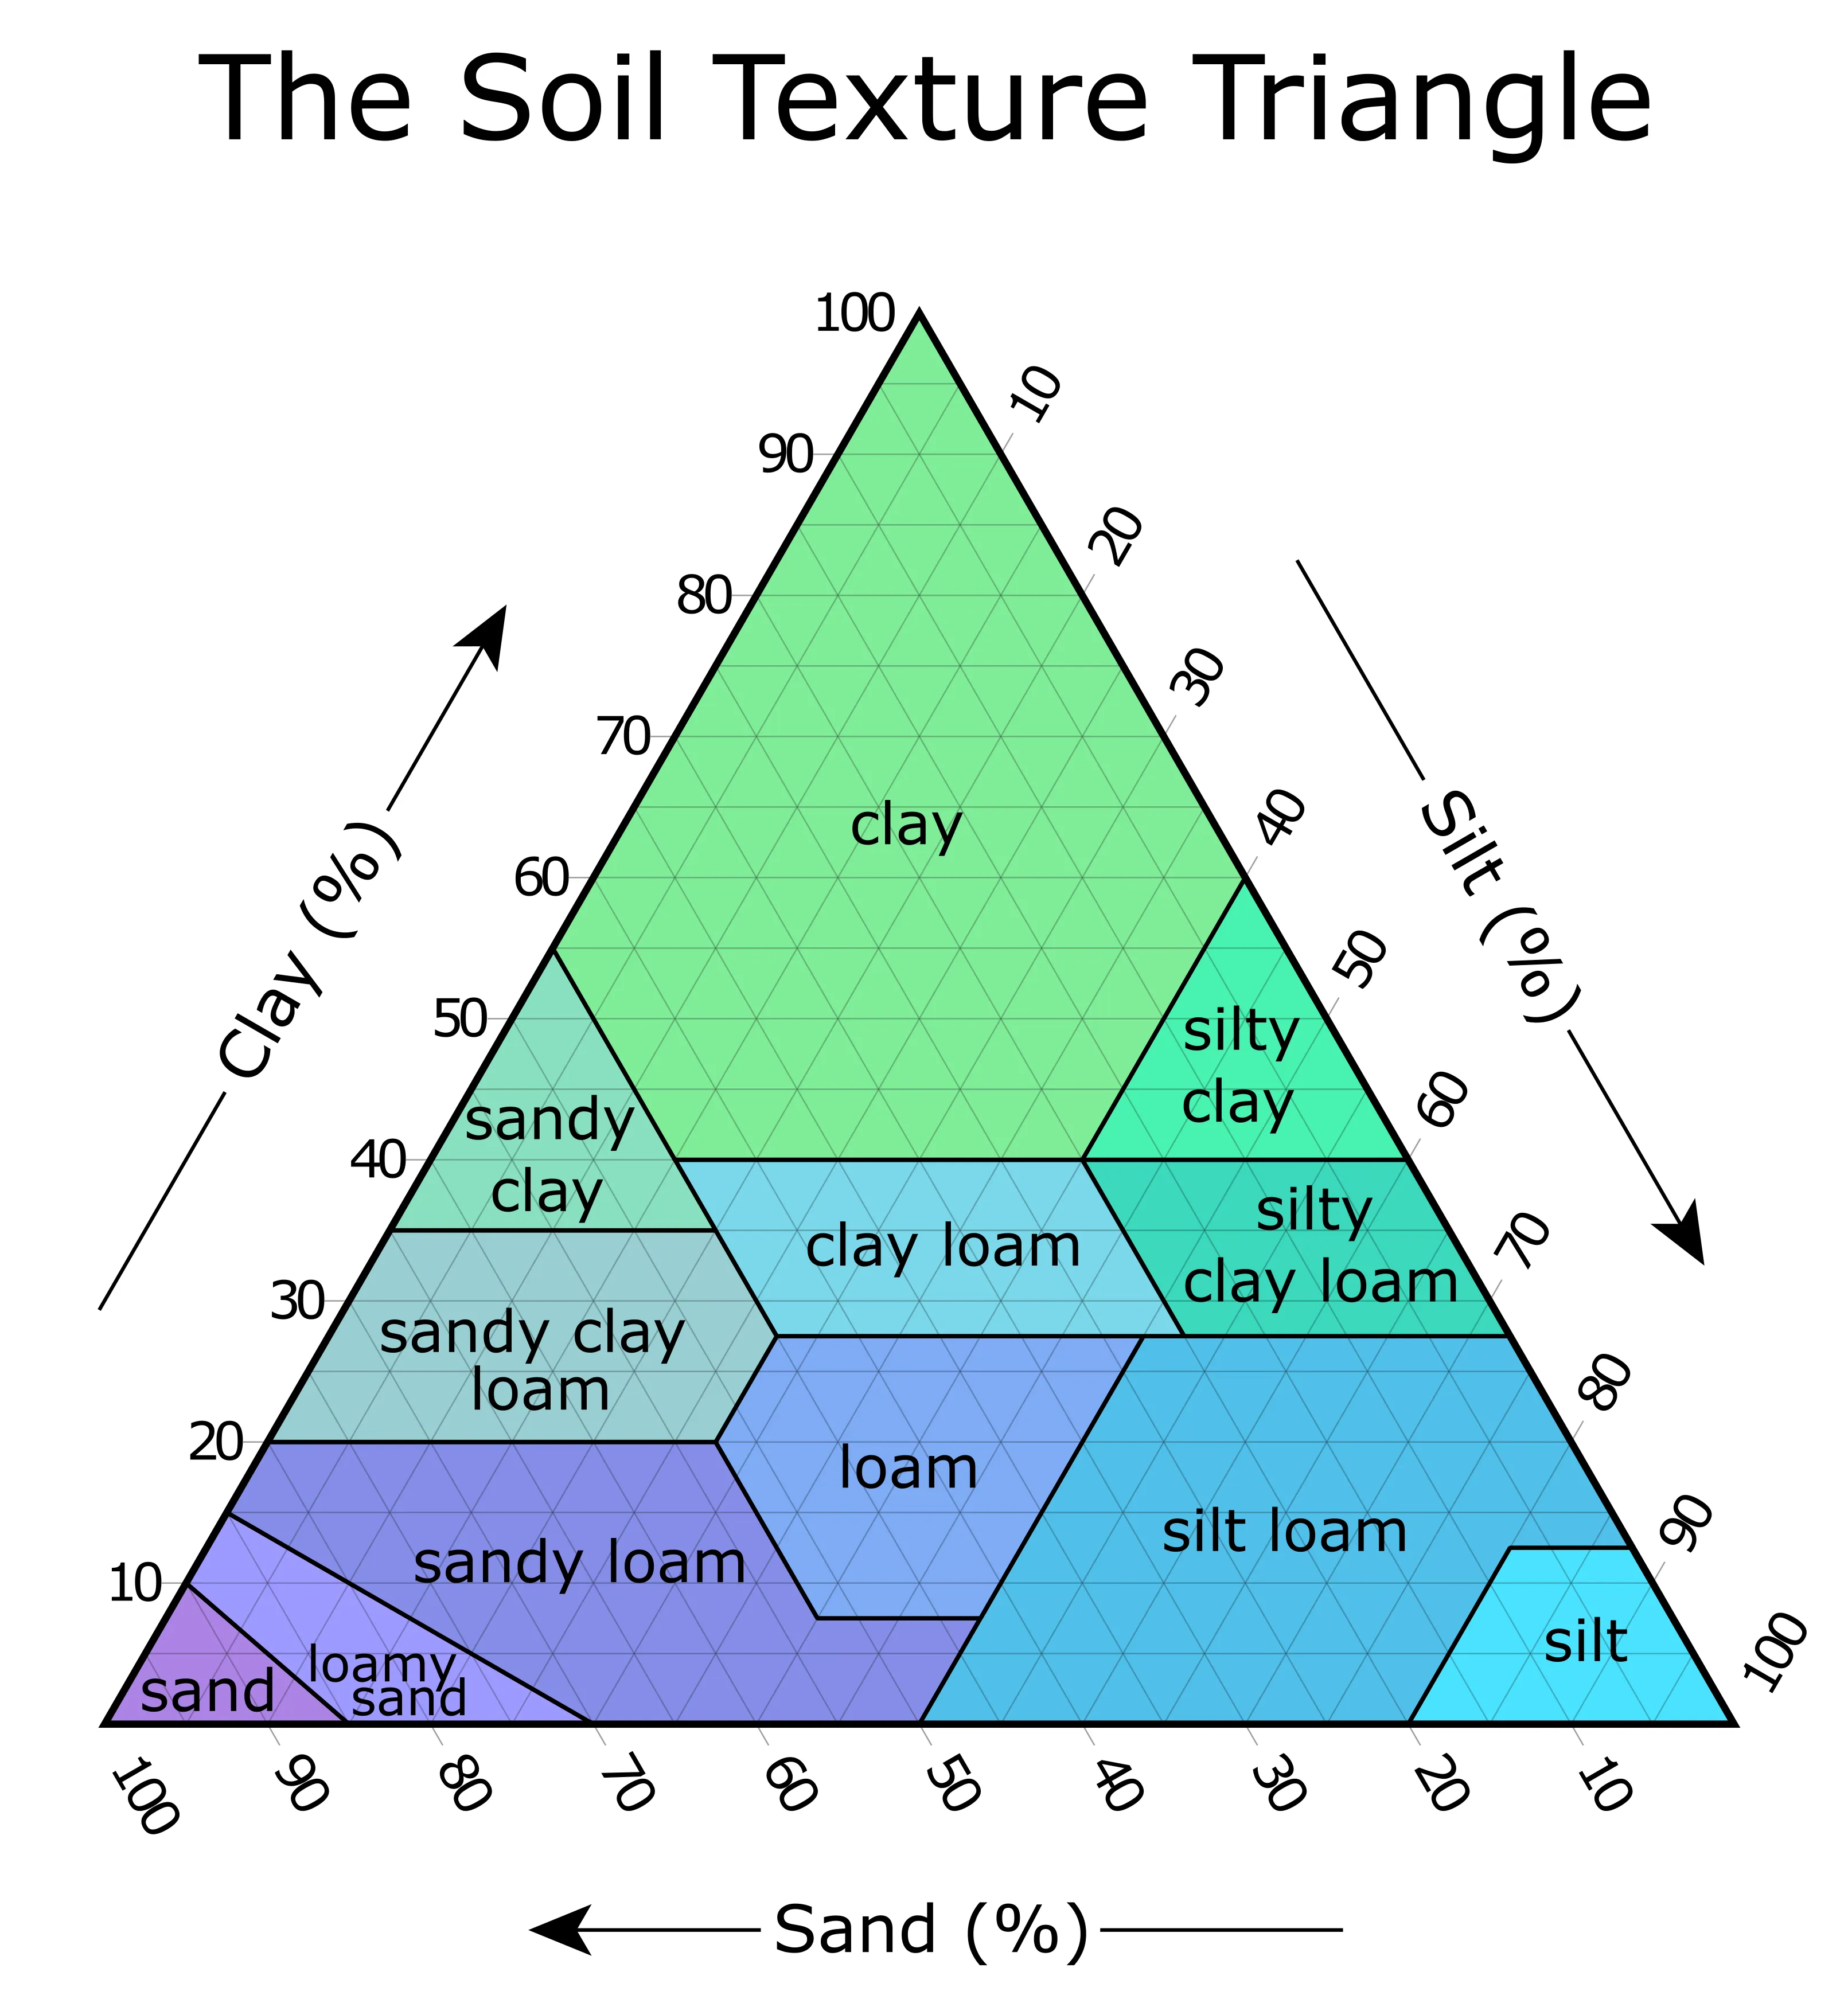
Credit: cmglee, Mikenorton, USDA
When we say 'texture' we're talking about the ‘feel’ of the soil. Each particle type in your soil has a different size. For this reason, their ratio drastically changes the feel and properties of your dirt.
Coarse sand --> diameter 2-0.2mm
Fine sand --> diameter 0.2-0.02mm
Silt --> diameter 0.02-0.002mm
Clay --> diameter less than 0.002mm
Disclaimer: This post may contain affiliate links. Refer to the privacy policy for more information.
The triangle is used identify your soil texture from the amounts of sand, silt, and clay present.
Note: The Soil Texture Triangle is one of a number of soil components. If you're interested in learning about the others, check out: Components of Soil.
How to Test Soil Texture
Let's take a look at how you can perform a soil texture test in order to identify the percentages present in your soil, and then pinpoint your soil texture on the triangle.
Materials Required for Soil Texture Test:
- Spade or trowel
- Quart Mason jar(s), 1 for each sample you'd like to test
- Mesh sieve
- Powdered dish detergent
- Ruler or tape measure
- Tape or rubberbands for marking jar levels
- Marker or Sharpie to write on the sticker or tape
Step #1 - Dig a Soil Sample
Grab a trowel and make good and sure that you dig your sample deep - at least 6 inches or more below the soil surface. You can also sample from further depths to understand your soil profile from a 3-dimensional perspective. I also suggest sampling from multiple places in each bed, plot, or planter. The more samples the better understanding you'll have of your soil.
Shoot for about 1 cup of soil per test if you're using a quart mason jar. Try to fill whatever jar you choose around 1/3 of the way up with the dirt.
Remember that soil can vary widely in different areas of your yard or garden, so don't just assume 1 sample will reflect your entire space.
I like taking samples of the native soil, as well as the soil I'm remediating so I can compare how far I've come. This gives me a great understanding of the progress I'm making towards building great dirt.
Step #2 - Sift Your Soil
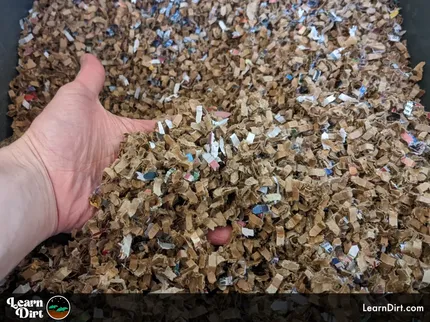
Now that you've got a sample, run it through a sieve to get the chunks out.
Sift out rocks, sticks, leaves, bark, and other large particulate.
If there are dried clumps of clay or compacted dirt, you can often squish these against the sieve to break them up.
I use a regular ol' mesh sieve for this, which you may already have in your kitchen:
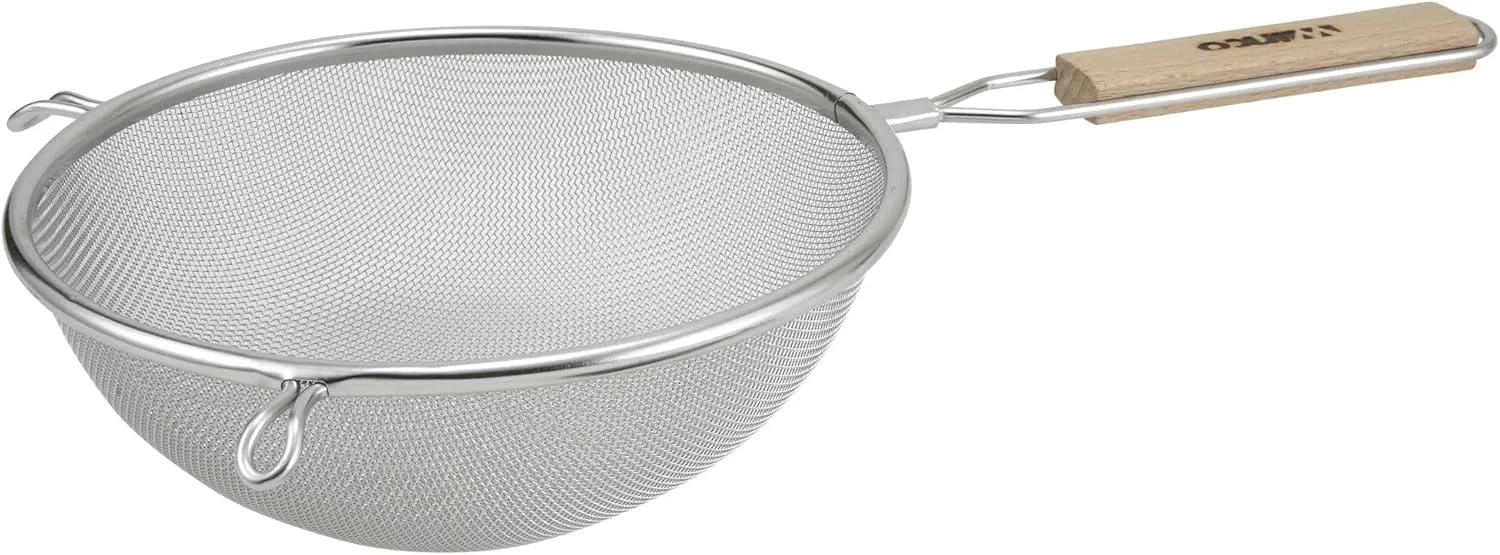
Shake your soil through the sieve, using your fingers to help work it through. Break up any compacted particles by hand. Ditch any rocks, sticks, or large pieces that can't fit through the strainer.
Join The Regenerative Gardening Community
Whether you cultivate vegetables, house plants, succulents,
mushrooms, flowers, cannabis, or more...
you're welcome here 🌱
Check It Out!
You should end up with a finer quality soil, devoid of large pieces of particulate and rocks. Great!
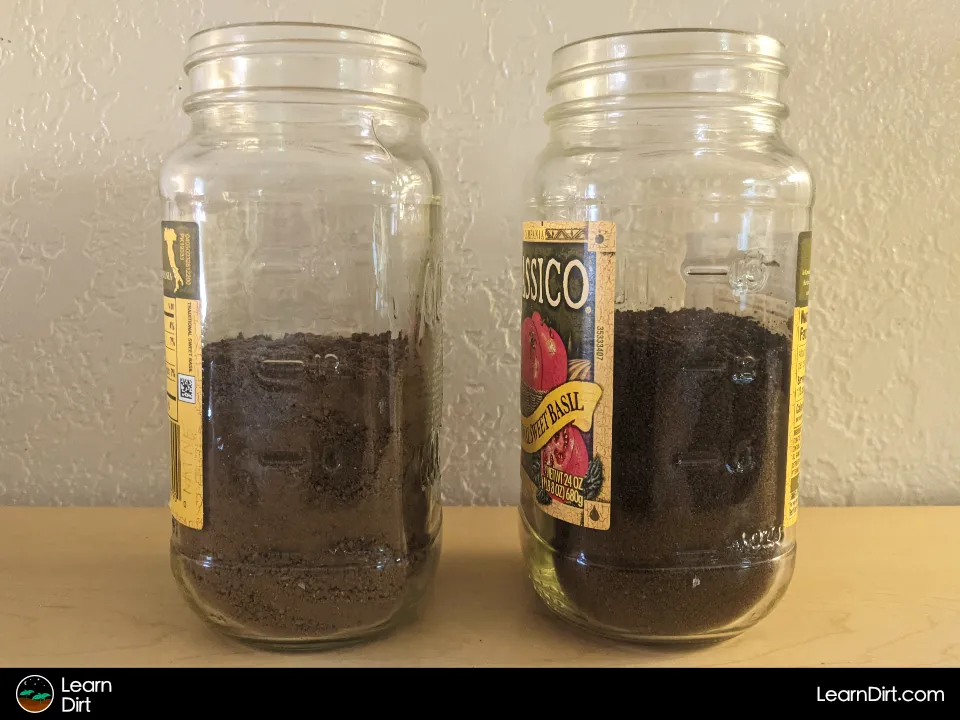
Step #3 - Fill a Quart Mason Jar With the Sifted Soil
Take your sifted soil, and pour it into a 1 quart mason jar. A wide-mouth jar works well for this, but a regular mouth will work too. You don't need to fill the jar all the way to the top, we're looking for about 1/2 of the way full though It doesn't have to be perfect.
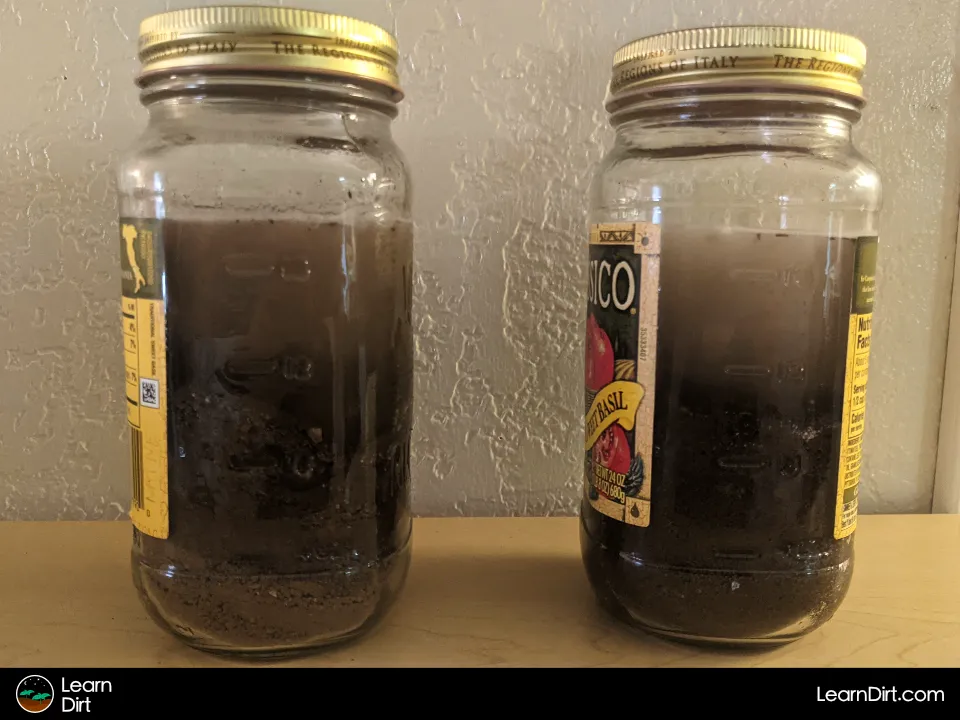
Step #4 - Add the Water
You can use any type of water for this, it doesn't have to be filtered or distilled, tap is fine. We're looking to get the jar about 75% full now, but again this doesn't have to be perfect.
Step #5 - Add the Dish Detergent
We need to add about 1 tablespoon of powdered dish detergent. As with everything else here, there's no need to be exact. This will help the particles to separate out.
Step #6 - Add the Lid and Shake
Screw the lid on your Mason jar tightly so it doesn't leak, and give the jar a thorough shake for a minute or so. You want to get it really mixed up, so put some effort into this and make sure it looks fully homogenized before you stop shaking.
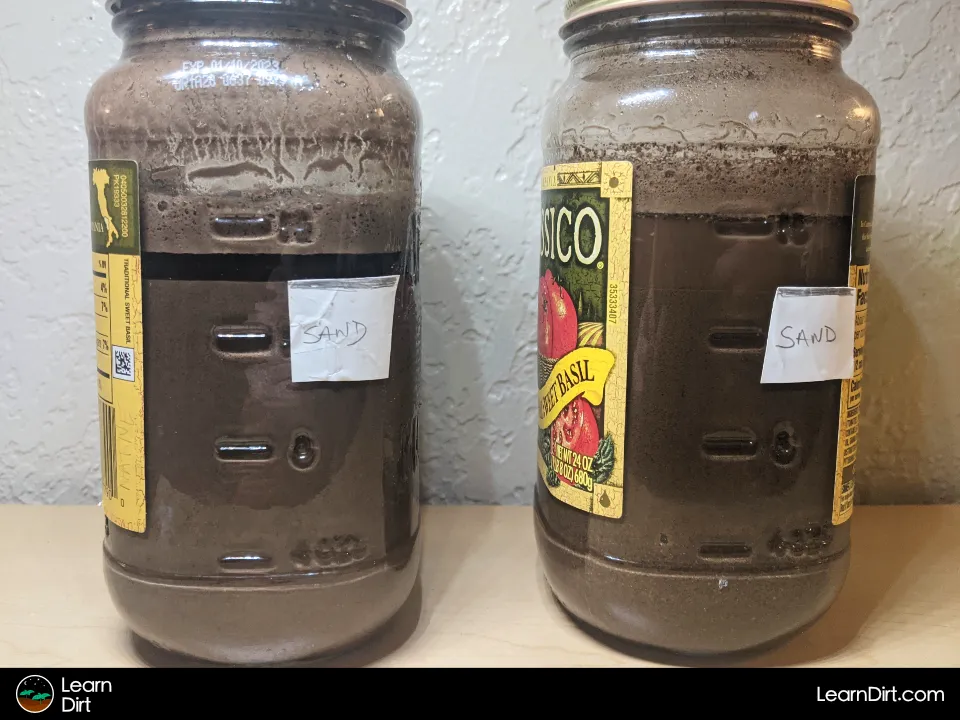
Step #7 - Mark the Sand Layer
Once everything's all blended together, put down your jar and immediately start a timer for exactly 60 seconds.
At the 60 second mark you're going to assess the sand layer. Using a marker, rubberband, or piece of tape, mark the level of the sand. It will have settled very quickly. You should see a distinct line between the settled sandy grit, and the cloudy silt / clay which hasn't settled.
Note
My very sandy soil takes about 3 to 5 minutes for the sand to settle enough to be able to mark the layer. If your dirt is also mostly sand and takes this long, that's fine!
Just keep a close eye on it and mark the sand line as soon as you can distinguish the spot where the sand and silt are differentiated. This should ideally take no more than 5 minutes, even in sandy soil.
Step #8 - Mark the Silt Layer
As soon as your sand layer is marked, set a timer for 2 hours.
When your 2 hour timer goes off, mark the silt layer.
Step #9 - Mark the Clay Layer
Once your silt layer has been marked, you'll want to wait a full 48 hours before marking the clay. Occasionally, this may even take 3, 4, or sometimes 5 days to settle out. There's no rush with the clay layer, but I recommend putting a reminder on your calendar for 2 days and see if the clay has settled at that time. If not, check back daily until it has.
Keep in mind that the clay layer will almost always be the thinnest layer, and sometimes won't be present at all. This is to be expected.
Step #10 - Assess Your Soil Composition
Now you're ready for the final step - assessing your soil composition!
Using your ruler or tape measure, you'll want to measure the thickness of each of the 3 bands (sand, then silt, then clay).
When you have all 3 measured, you can go ahead and add them together to get the thickness of all 3 bands.
Next, divide the thickness of all each band into the total. For instance, if all 3 bands combined are 20mm and your sand band is 12mm, divide 12 into 20 (12 / 20 = 0.6 or 60%).
If your silt layer is 6mm, divide that into the total (6 / 20 = 0.3 or 30%).
If your clay layer is 2mm, divide that into the total (2 / 20 = 0.1 or 10%).
Great, you now know your soil composition percentages. In this example our soil is 60% sand, 30% silt, and 10% clay.
How to Read the Soil Texture Triangle
Scroll back up to the top of this article for the soil composition triangle, and compare your numbers. Follow the sand percentage line, and find where it meets the silt percentage line. Where these meet, you should also see the correct clay percentage line intersecting. In our example we find that we have sandy loam.
Congratulations, you've just performed your soil composition test! You now know the textural classification of your soil.
Soil Texture Classifications
- Sand
Very coarse, drains quickly, holds little water or nutrients. - Loamy Sand
Mostly sand but with a bit more silt/clay; still fast draining. - Sandy Loam
Balanced feel, more nutrients and water-holding than pure sand. - Loam
Ideal mix of sand, silt, and clay; fertile and well-drained. - Silt Loam
Smooth, retains more water than loam, less drainage. - Silt
Very fine particles, holds water well, prone to compaction. - Sandy Clay Loam
Grainy but sticky, moderate water retention and nutrients. - Clay Loam
Heavier, holds water well, fertile but slower drainage. - Silty Clay Loam
High silt and clay, very fertile, drains poorly. - Sandy Clay
High sand and clay, drains better than pure clay but heavy. - Silty Clay
Mainly clay and silt, very fine and holds water tightly. - Clay
Very dense, holds water and nutrients well, drains poorly.
Additional Resources
If you're interested in learning more about your soil, check out some of the following articles:
- Components of Soil
- Soil Structure - How Soils Aggregate Together
- Soil Organic Matter Content (SOM)
- Why Should You Test Your Garden Soil pH?
- Building Soil
- Organic Nutrients for Soil
- How to Improve Soil Quality
- Growing in Sandy Soil
- Alkaline Soil
- Soil Not Absorbing Water
We found many of the soil texture charts online to be, frankly, quite ugly - so we recolored the version at the top of this article to address that.
We also recognize the need for a high-contrast version that helps improve readability for the visually-impaired and folks with color-blindness, and created the alternate recoloring below for that reason.
Both contain the same info, so feel free to use whichever you like.
Credit: cmglee, Mikenorton, USDA
Final Thoughts
Assessing your soil composition and texture can be a great first step towards building great soil. Remember to run through the test again after a year or two to assess how your soil improvement efforts are materializing.
That's it for the soil texture triangle!
I hope you got some value from this article. If you did, please share it with others and remember to never stop growing.
That's all for now, thanks for reading!
If you have any questions, comments, or would like to connect with fellow gardeners, head on over to the forum and post there.